![]()
Automatic Data Entry System in Excel

An Automatic Data Entry System in Excel is an advanced setup created using Microsoft Excel that allows users to enter data in one sheet and automatically store it in another sheet using Macros (VBA automation).
In this system, data is entered in a Home sheet, and with the help of a macro, it is automatically transferred to a Data sheet, which can be locked and hidden for security and data protection.

🔹 Simple Definition
An Automatic Data Entry System is a structured Excel solution that:
- Takes input from a user-friendly entry form (Home sheet)
- Automatically saves data into a database sheet
- Secures the data by locking and hiding the sheet
- Reduces manual copy-paste work
🔹 Sheets Included in the System
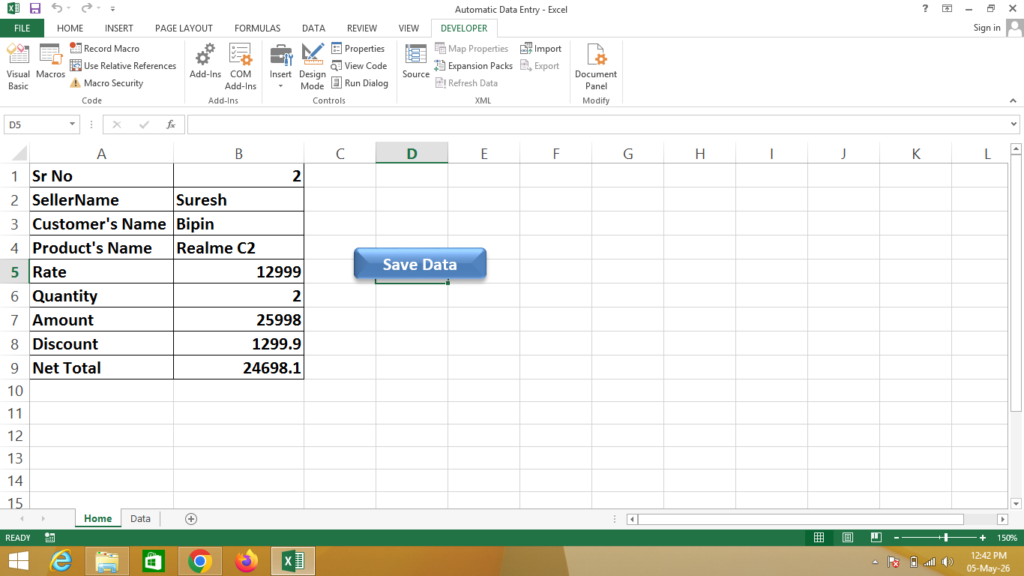
🏠 1. Home Sheet
- Used for entering data
- Simple and user-friendly interface
- Can include input fields like Name, Date, Amount, etc.
- Button (macro) to submit data
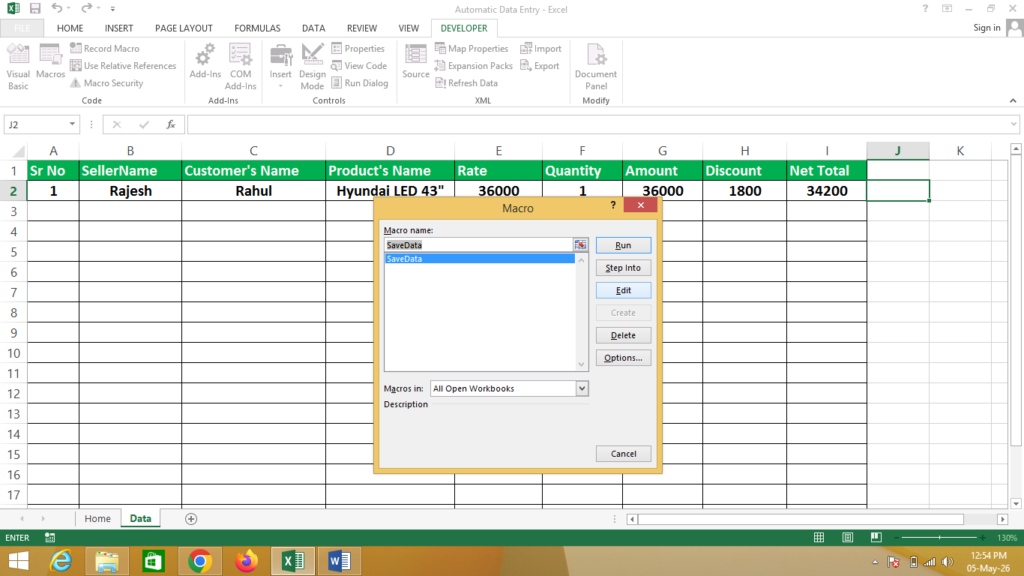
📂 2. Data Sheet
- Stores all records automatically
- Works as a database
- Gets updated using macros
- Can be hidden and locked for security
🔹 How it Works
- User enters data in the Home sheet
- Clicks on a Submit button
- Macro automatically copies data
- Data gets pasted into the Data sheet
- Data sheet remains hidden and protected
🔹 Key Features
- ✔ Fully automated using VBA Macros
- ✔ Secure data storage (hidden & locked sheet)
- ✔ No manual copy-paste required
- ✔ User-friendly interface
- ✔ Suitable for data entry systems
🔹 Why use Excel for Automatic Data Entry?
- ✔ Saves time and effort
- ✔ Reduces human errors
- ✔ Easy to customize
- ✔ No need for expensive software
- ✔ Ideal for small businesses and offices
🔹 Real-life Uses
- Office data entry systems
- Student record management
- Billing and transaction entry
- Small database systems
- Form-based data collection
Formula
Amount = Click on Rate * Click on Quantity
Discount = Click on Amount * 5%
Net Total = Click on Amount – Click on Discount
Macros Steps
For Record Macro “Save Data”
- First Turn on Developer Tab
- Complete Data Entry
- After That Click on Developer Tab & Click on Record Macro & Name = SaveData
- Now Select in Home Sheet from Sr No to Net Total & Copy that range of Data
- Now Go to Data Sheet & Click in J1 Cell
- Press Ctrl + Down Arrow, Ctrl + Left Arrow, Ctrl + Up Arrow
- Now Click on Use Relative References
- Now Press Only Down Arrow
- Press Ctrl+Alt+V & Now Click on Values Option and Click on Transpose Option & Click on OK
- Set Data Formatting According to You
- Press Right Arrow to Go to J2 Cell
- Now Go to Developer Tab & Turn Off Use Relative References Option
- Now Go to Dashboard Sheet & Select Data from Sr No to Quantity & Press Delete Button
- Now Click in Date Cell & Stop Recording (Macro Recording has been Stopped)
- Now Select SaveData Shape & Right Click on That Shape (TextBox)
- Now Click on Assign Macro & Click on SaveData Macro & Click on Ok
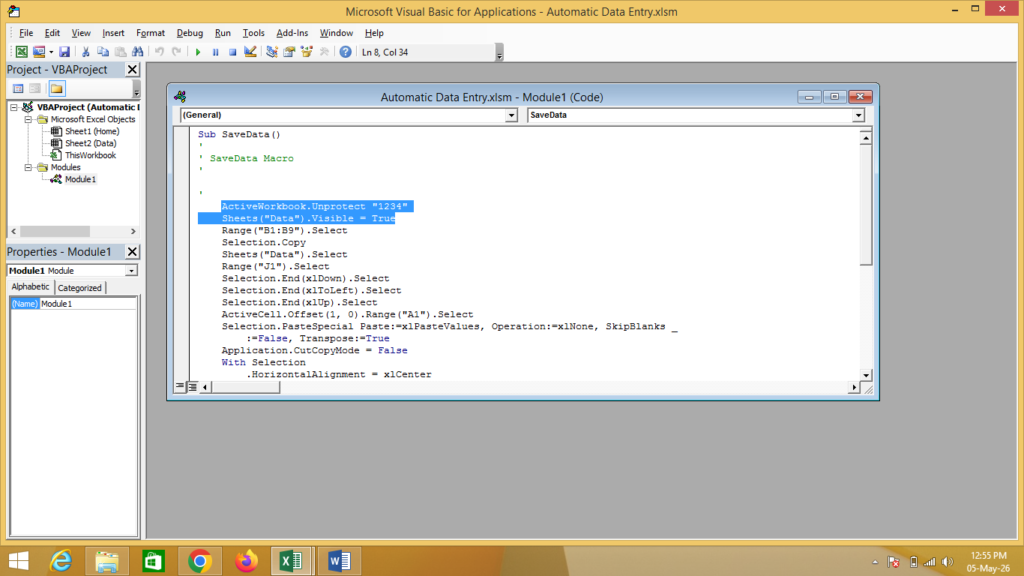
Code for Locked Sheet (Data)
Click On Developer Tab and Click on Macros

Click on Edit as Given Below
Now Enter Code Here To Lock Sheet Properly
Code Must Be Above Range
ActiveWorkbook.Unprotect “1234”
Sheets(“Data”).Visible = True
Code Must Be Below Range
Sheets(“Data”).Visible = False
ActiveWorkbook.Protect “1234”
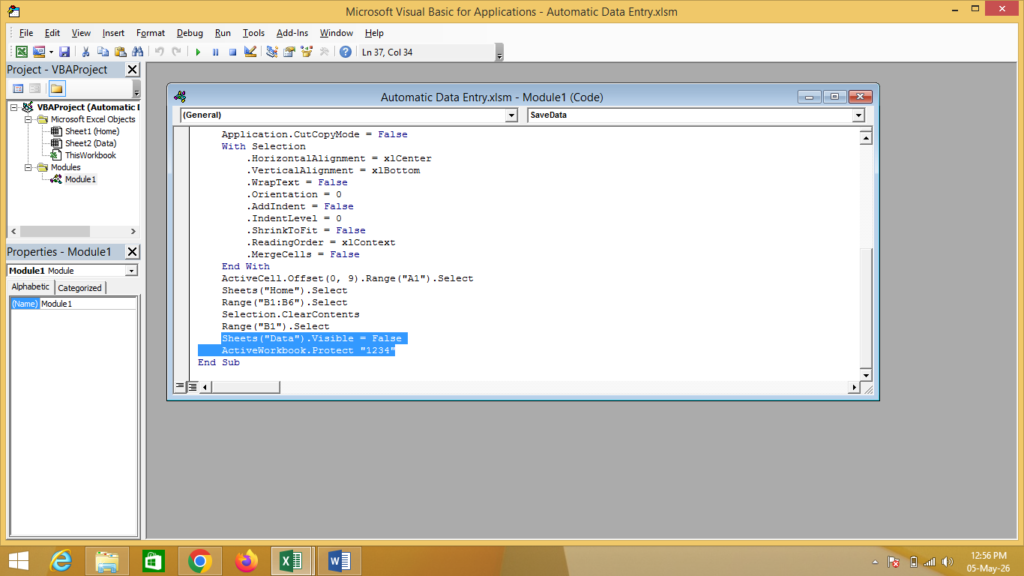
Now Save as Macro Enabled Workbook
Enable Macros To Work Properly
If You Need a Help – Watch Video